When it comes to making your backyard more functional and efficient, having outdoor power access is a game-changer. Whether you want to illuminate your outdoor parties, power gardening tools, or set up cozy decorative lights, a well-placed electrical outlet post can handle it all.
Installing a DIY outdoor electrical outlet post might sound daunting, but it’s more achievable than you think. In this comprehensive guide, we’ll explore the benefits, tools, materials, safety tips, and step-by-step instructions to help you create a backyard power solution you can rely on.
Why You Need a DIY Outdoor Electrical Outlet Post
Say Goodbye to Messy Extension Cords
We’ve all been there—running extension cords through windows or across yards. Not only does it look unsightly, but it’s also unsafe. An outdoor electrical outlet post eliminates the need for makeshift power solutions and brings energy exactly where you need it.
Power Your Outdoor Activities
From outdoor kitchens to fountains and even projector setups for movie nights, an outlet post makes your outdoor space more versatile. You’ll wonder how you ever managed without one.
Boost Property Value
Adding outdoor electrical outlets is a simple but effective upgrade that adds convenience and appeal to your home. Future buyers will appreciate the foresight and practicality of this feature.
Tools and Materials You’ll Need

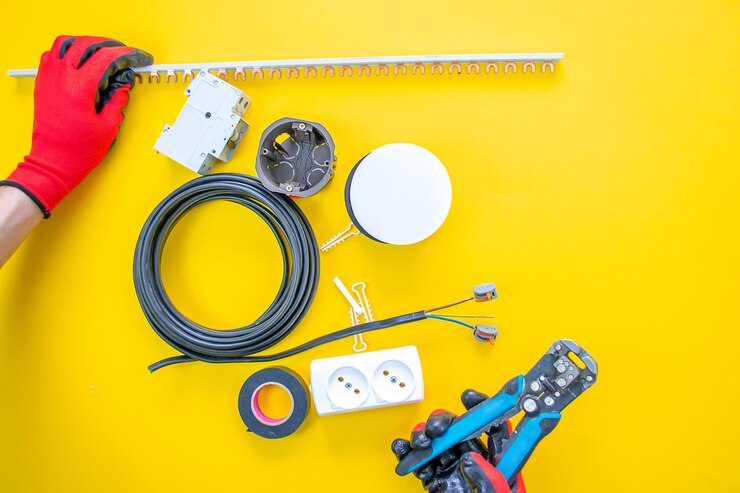
Before diving into your project, make sure you have the right tools and materials on hand. Preparation is half the battle.
Tools Checklist
- Screwdrivers:Both flathead and Phillips for different screws.
- Drill and bits:To secure the outlet post and electrical box.
- Wire strippers:For preparing electrical wires.
- Voltage tester:To confirm the power is off before you start working.
- Measuring tape:For precise measurements.
- Level:To ensure your post stands straight.
- Shovel:If trenching is required for underground wiring.
Materials Checklist
- Electrical outlet post:A weatherproof, outdoor-rated post designed for durability.
- GFCI outlet:A must for outdoor use to prevent electrical shocks.
- Conduit:Choose PVC or metal conduit to protect your wiring.
- Electrical wire:Outdoor-rated wires that can withstand weather conditions.
- Wire nuts:For secure connections.
- Weatherproof outlet cover:To protect your outlet from rain and dirt.
- PVC cement or fittings:For connecting conduit sections securely.
Planning Your Outdoor Electrical Outlet Post Installation
Check Local Codes and Permits
Every city or town has electrical codes that govern outdoor installations. Check if you need a permit or inspection before starting. It’s better to handle the paperwork upfront than face fines or complications later.
Choosing the Right Location
The placement of your outdoor electrical outlet post is key. Here are some tips to choose the perfect spot:
- Accessibility:Make sure it’s easy to reach for all your outdoor activities.
- Flood-prone Areas:Avoid placing the outlet in low spots where water can collect.
- Distance:Ensure the outlet isn’t too far from your home’s power source to simplify wiring.
Step-by-Step Guide to Installing a DIY Outdoor Electrical Outlet Post
1. Turn Off the Power
Safety first! Go to your electrical panel and switch off the circuit you’ll be working on. Use a voltage tester to double-check that no power is running to the wires you’ll be handling.
2. Dig a Trench (If Necessary)
If your project requires underground wiring, dig a trench to bury the conduit. Most codes require a depth of 18-24 inches. Check your local requirements to be sure.
3. Install the Conduit
Cut your conduit to the required length using a PVC cutter or saw. Securely connect the sections using PVC cement or fittings, then lay the conduit in the trench.
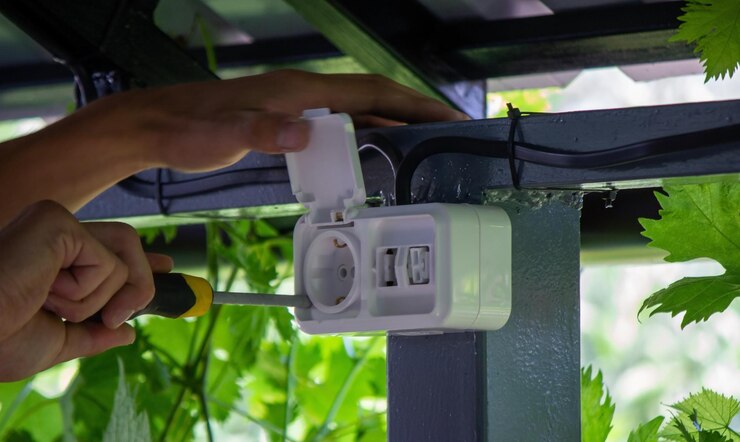
4. Wire the Electrical Box
- Mount the outdoor-rated electrical box to your outlet post.
- Pull the electrical wires through the conduit into the box.
- Connect the wires to your GFCI outlet. Typically, black wires connect to brass terminals, white wires to silver terminals, and green or bare wires to the ground terminal.
5. Secure and Test
Mount the outlet post securely into the ground. Turn the power back on and test the outlet with a voltage tester to ensure everything works properly.
Safety Tips for Outdoor Electrical Installations

Working with electricity requires extra caution, especially outdoors. Here’s how to stay safe:
- Use Insulated Tools:Always use tools with insulated handles to reduce shock risk.
- Double-check Grounding:Proper grounding is essential for safety.
- Weatherproof Your Setup:Protect your outlet with a cover to shield it from moisture and debris.
- Test GFCI Outlets Regularly:Press the “Test” button on your GFCI outlet monthly to ensure it’s functioning properly.
Maintenance Tips for Your Outdoor Electrical Outlet Post
After installation, regular maintenance will keep your outlet post in excellent condition:
- Inspect Frequently:Look for signs of wear, rust, or damage.
- Clean Periodically:Wipe down the outlet and cover to prevent dirt buildup.
- Test Safety Features:Ensure the GFCI feature works by testing it with a GFCI tester.
Key Takeaway
Installing a DIY outdoor electrical outlet postis a practical and rewarding project that enhances the functionality, convenience, and safety of your outdoor spaces. By following this guide, you’ll not only save money but also gain the confidence and skills to complete the installation effectively. From understanding local codes and gathering the right tools to ensuring proper safety measures, every step plays a crucial role in achieving a reliable power solution for your backyard. Remember, regular maintenance and testing are essential to keep your outlet post in top condition for years to come.
Looking ahead, the growing trend of outdoor living spaces highlights the importance of accessible power solutions. A DIY outdoor electrical outlet postsets the foundation for future upgrades like outdoor kitchens, smart garden lighting, or even charging stations for electric equipment. If you have questions about this guide or want to share your DIY experiences, we’d love to hear from you in the comments. Your feedback not only helps us improve but also builds a community of homeowners embracing smart and sustainable outdoor solutions.
People Also Ask
Here are some frequently asked questions about installing outdoor electrical outlets:
How deep should the trench be for outdoor wiring?
The trench for outdoorelectrical wiring should typically be at least 18 inches deep for PVC conduit or 6 inches for rigid metal conduit, as per the National Electrical Code (NEC). This depth protects the wiring from damage caused by surface activities like digging or landscaping. Always check local building codes, as they may have specific requirements or permit conditions.
Can I use regular electrical wire for outdoor outlets?
No, regular indoor electrical wire is not suitable for outdoor use due to its lack of weatherproofing. Instead, use wires rated specifically for outdoor use, such as UF-B (underground feeder cable) or THWN-2 (suitable for conduit installations). These wires are designed to resist moisture, UV rays, and temperature fluctuations, ensuring long-term safety and functionality.
Do I need a permit for outdoor electrical work?
In most jurisdictions, a permit is required for installing outdoor electrical outlets to ensure compliance with safety standards and local electrical codes. Permits also often include inspections to verify proper installation. Contact your local building authority to confirm requirements and avoid potential fines or hazards.
What is a GFCI outlet, and why is it important?
A Ground Fault Circuit Interrupter (GFCI) outlet is a safety device that protects against electrical shocks by shutting off power when it detects ground faults or leaks in the circuit. It is critical for outdoor use where moisture increases the risk of electrical hazards. GFCI outlets are required by code for all outdoor installations to ensure safety and compliance.
Can I install an outdoor outlet without professional help?
Yes, a DIY installation is possible if you have basic electrical knowledge, the right tools, and an understanding of local codes. However, if you’re unfamiliar with electrical work or the project involves complex wiring, hiring a licensed electrician is recommended for safety and compliance. Always prioritize safety and seek guidance when in doubt.
Expert Electrical Solutions for Your Backyard Projects
Enhance your backyard’s functionality and safety with a DIY outdoor electrical outlet post—the perfect solution for powering your outdoor activities. If you’re unsure where to start or need professional assistance, Boca Electrical Services, Inc. is here to help. With over 38 years of combined expertise, we specialize in residential and commercial electrical solutions, including outlet installations and upgrades, across Boca Raton and South Florida.
Explore the tools and techniques mentioned in this article, or visit other sections of the Softlist website for more tips and insights on optimizing your outdoor spaces. For personalized recommendations tailored to your needs, call Boca Electrical Services, Inc. today at +1 561-235-2513, or visit us at 158 NW 16th St #2, Boca Raton, FL 33432, United States. Let our trusted family-owned team transform your backyard power solutions with professionalism and care.