Changing out a light fixture is a common DIY task that many homeowners take on to refresh their space or upgrade outdated lighting. However, this seemingly simple project can quickly turn into a headache if you’re not careful. From faulty wiring to improper installation, there are several mistakes that can not only affect the look of your new fixture but also put your safety at risk. In this guide, we’ll highlight the common mistakes to avoid when changing out a light fixture, providing expert tips to help you complete the job safely and effectively. Whether you’re replacing an old light fixture, upgrading to a modern pendant, or troubleshooting issues with a new installation, we’ve got you covered. Keep reading to learn how to avoid these pitfalls and ensure your lighting upgrade goes smoothly.
Not Turning Off the Power Supply Before Starting
One of the most critical mistakes homeowners make when changing out a light fixture is neglecting to turn off the power supply first. Even for experienced DIYers, this essential step is often overlooked, posing serious safety risks. Working on electrical fixtures while the power is still on can result in severe electric shocks, fires, or even fatal accidents. It’s easy to forget to turn off the power, especially in the heat of a project, but this simple safety measure can protect you from harm.
Why You Should Always Turn Off the Power Supply
Before you even begin handling any wiring, you must ensure that the circuit supplying power to your light fixture is turned off. Failing to do so not only jeopardizes your safety but can also cause damage to your electrical system, increasing repair costs.
Here’s how to safely turn off the power supply:
- Locate the Circuit Breaker: Identify the breaker controlling the light fixture’s circuit and flip it to the off position. Make sure to label your breaker panel clearly so you can find the correct switch easily in the future.
- Use a Voltage Tester: After turning off the breaker, use a voltage testerto verify that no electricity is running through the wires. Test each wire by placing the tester’s probe on the metal surface. If the tester lights up, the circuit is still live and needs to be de-energized before proceeding.
- Post a Warning Sign: To avoid accidents, post a warning sign or inform other household members that the power is off and that no one should flip the breaker back on until the work is complete.
- Always Double-Check: It’s not enough to just flip the switch. Even experienced electricians use voltage testers to confirm that the circuit is de-energized. Always double-check with a tester to avoid potential electrical hazards.
Forgetting to Check Compatibility of the New Light Fixture
When it comes to changing out a light fixture, compatibility is key. A fixture that doesn’t match the electrical setup in your home can cause a range of issues, from wiring problems to malfunctioning lights. Many homeowners rush through this step, assuming that all light fixtures are interchangeable, but this can lead to unsafe or inefficient installations. Ensuring that your new light fixture is compatible with your home’s electrical system and meets safety standards is essential for both functionality and safety.
How to Verify the Compatibility of a New Light Fixture
To avoid frustration and potentially hazardous outcomes, take the time to check your fixture’s compatibility with your existing wiring and mounting setup. Here’s how to do it properly:
- Measure the Space: Ensure the fixture is the right size for your ceiling or wall. Check the ceiling heightand junction box dimensionsto ensure the fixture fits securely. If it’s a pendant light, also account for the drop length.
- Check Voltage and Wattage: Make sure the fixture is rated for the correct voltageand wattage. Using a fixture with a higher wattage than your circuit is designed to handle can cause overheating, which could potentially lead to electrical fires.
- Confirm Bulb Compatibility: Verify the type of bulbyour new fixture requires (incandescent, LED, CFL) and ensure it’s compatible with your home’s electrical system. If you’re upgrading to energy-efficient LEDs, double-check the fixture’s socket type and wattage limit.
- Mounting Style and Hardware: Different light fixtures require different mounting methods (flush mount, pendant, chandelier), and using the wrong mounting hardware can cause the fixture to be unstable. Be sure to check that the provided hardware matches your ceiling type and that it is rated for the weight of the fixture.
Overlooking the Condition of the Wiring
When changing out a light fixture, it’s easy to assume that the wiring is fine if it was working previously. However, old, frayed, or improperly installed wiring can lead to dangerous short circuits, electrical fires, or damage to your new fixture. Even if the wiring looks okay on the surface, it’s essential to perform a thorough inspection to ensure its safety and quality.
How to Inspect the Wiring for Safety and Quality
Wiring is the heart of any electrical installation, and even small problems can lead to big risks. Here’s how to check the condition of your wiring:
- Inspect for Wear and Tear: Look for frayed wires, cracks, or exposed copperthat may indicate the wires have been compromised over time. If you see any visible signs of damage, replace the wires before proceeding.
- Check the Grounding: Make sure the wiring is properly grounded. Grounding is a critical safety feature that helps prevent electrical shocks. If you’re unsure whether your system is grounded properly, consult a licensed electrician.
- Test for Continuity: Use a multimeterto test for continuity in the wires. This helps you identify if there’s a break or fault in the circuit. Proper continuity ensures that the electrical current will flow correctly when the fixture is installed.
- Assess Load Capacity: Ensure the existing wiring can handle the load of your new light fixture. This is particularly important if you’re upgrading to a heavier fixture or one with higher power demands. If in doubt, consult an electrician.
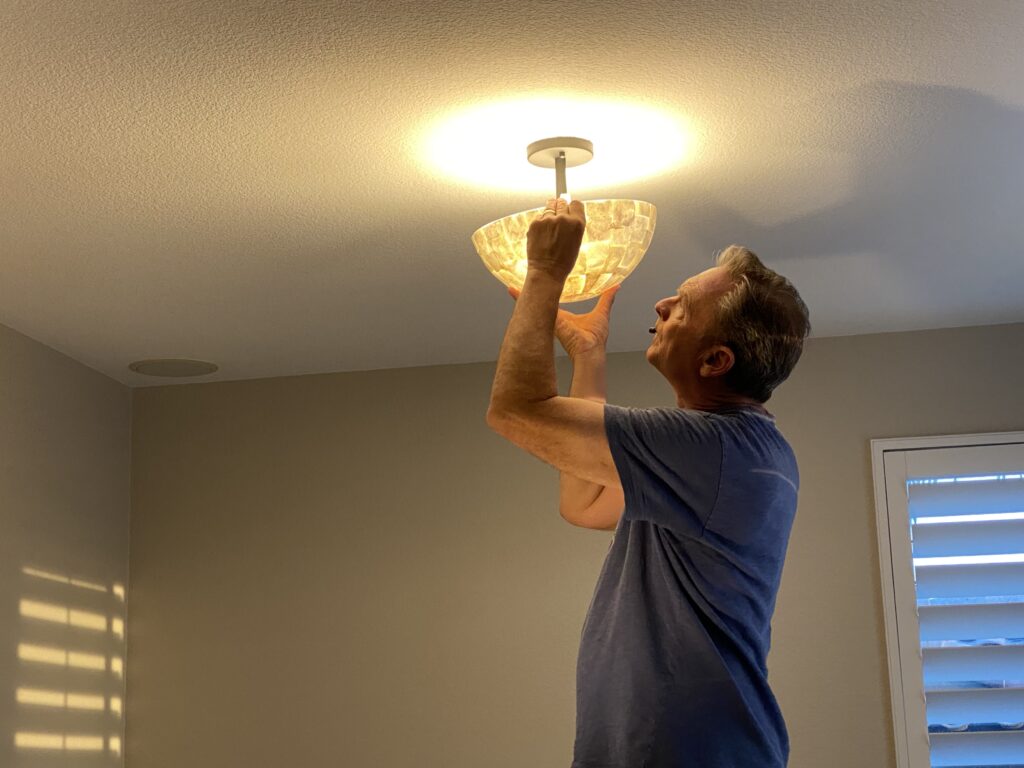
Improperly Securing the Light Fixture
An improperly secured light fixture is not only unsightly but can also be dangerous. If a fixture is loosely installed, it can fall, causing damage to the fixture or injury to people nearby. Additionally, a poorly aligned fixture will cause uneven lighting, reducing the aesthetic value of your space. To ensure safety and durability, securing the fixture properly is a non-negotiable step in the installation process.
How to Properly Secure Your New Light Fixture
To prevent the fixture from shifting or falling, use these tips to ensure it’s firmly attached:
- Use Correct Screws and Mounting Bracket: Always use the screws and mounting hardware that come with the fixture. The manufacturer designs these components to match the fixture’s weight and mounting style. Using incorrect or inadequate hardware can result in a sagging or unstable fixture.
- Check Junction Box Stability: The junction boxshould be securely mounted to the ceiling or wall. If the box is loose, it can cause the fixture to hang incorrectly or even detach over time. If necessary, replace or reinforce the junction box before proceeding with the installation.
- Tighten All Screws Securely: Tighten all screws used to mount the fixture, ensuring it is properly aligned and stable. However, be cautious not to overtighten, as this could strip the threads or damage the fixture’s mounting points.
- Test for Stability: Once the fixture is mounted, gently tug on it to ensure it’s secure. If there’s any wobbling, recheck the mounting bracket and screws for proper alignment.
Underestimating the Difficulty of the Job
Changing out a light fixture may seem like a straightforward task, but the complexity can increase depending on the existing electrical setup, fixture type, and mounting style. Homeowners often underestimate the challenges involved, especially when they encounter outdated or complicated wiring systems. Not fully understanding the scope of the job can lead to unnecessary frustration or mistakes.
When to Call a Professional Electrician
There are certain situations when hiring a professional electrician is the best choice:
- Outdated or Faulty Wiring: If your home has old wiring(such as knob-and-tube or aluminum wiring) or if the existing wires appear damaged, it’s crucial to consult an electrician. Faulty wiring can pose serious risks, including fires and electrical shocks.
- Unclear Wiring Configuration: If you’re unsure about which wires to connect, how to wire a dimmer switch, or need to modify the circuit, an electrician will have the expertise to handle these complexities safely.
- Heavy Fixtures or Special Equipment: Installing heavy light fixtures (e.g., chandeliers, large pendants) requires special tools and additional structural support. If the fixture is too heavy for the standard mounting, it’s best to bring in a pro.
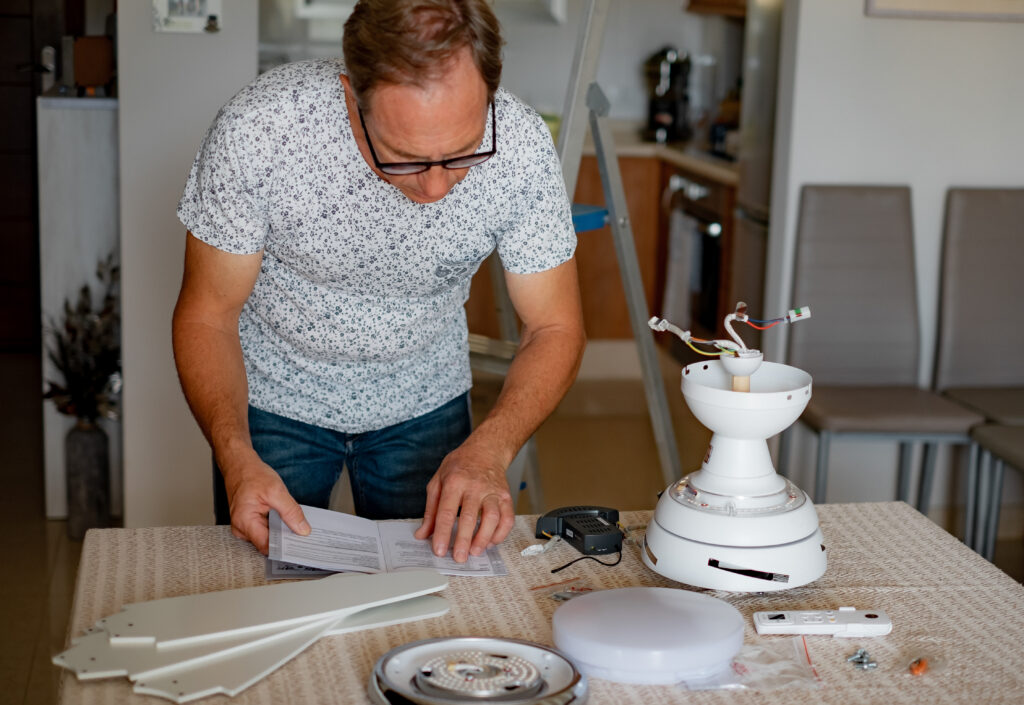
Using the Wrong Tools for the Job
The right tools make all the difference when changing out a light fixture. Using improper tools can damage the fixture or cause improper installation, which could lead to future problems like short circuits or faulty operation. Investing in high-quality tools can save you time, ensure accuracy, and contribute to a safe, long-lasting installation.
What Tools Do You Need to Change a Light Fixture?
Here’s a list of essential tools to have on hand for a smooth and efficient light fixture installation:
- Voltage Tester: This is crucial for confirming that the power is off before you begin working. Never rely on guesswork—always use a voltage tester to verify there is no electrical current in the fixture wiring.
- Wire Cutters/Strippers: These tools are used for trimming and stripping wires to ensure they are the correct length and that the insulation is properly removed for a secure connection.
- Screwdrivers: You’ll need both flatheadand Phillips screwdriversto secure the mounting screws and wire connectors. The right screwdriver prevents damage to the screws and ensures a tight fit.
- Pliers: Use needle-nose pliersor lineman’s pliersto twist wires securely, particularly when connecting different wiring components like wire nuts.
- Drill(if necessary): If you need to create new mounting holes in the ceiling or wall, a drill with the appropriate bit size is essential.
Failing to Follow Manufacturer Instructions
When changing out a light fixture, the manufacturer’s instructions are a vital resource that you should not ignore. These instructions are specifically designed to ensure the fixture is installed safely and correctly, accounting for factors such as wiring configurations, mounting styles, and safety warnings. Skipping over or misunderstanding these instructions can lead to improperly installed fixtures, electrical malfunctions, and, in some cases, hazardous situations like electrical fires or electrical shocks.
How to Read and Understand Light Fixture Instructions
Every light fixture comes with a detailed instruction manual, which serves as a guide to ensure that the installation is carried out according to industry standards. Here’s how to navigate and follow the manufacturer’s instructions effectively:
- Study the Wiring Diagram: Most light fixture instructions include a wiring diagram. This diagram illustrates the connections for the hot wire, neutral wire, and ground wire. Pay close attention to the color codes and make sure they align with your existing wiring setup. Incorrect wiringcan lead to short circuits or even electrical fires.
- Identify Safety Warnings: Manufacturer instructions often include specific safety precautionsto ensure proper installation. Look out for warnings related to using specific types of wire connectors(wire caps), insulation requirements, or grounding methods. These are critical for the safe operation of your fixture.
- Mounting Instructions: Follow the mounting instructions carefully to ensure the fixture is secured properly. Whether it’s a flush mount, pendant light, or chandelier, the stability of the fixture depends on how well it’s mounted. Ensure the junction boxand mounting bracketare compatible with your ceiling or wall type, and that the screws and anchors are rated for the weight of the fixture.
- Consult Help When Needed: If any part of the instruction manual is unclear or seems confusing, don’t hesitate to seek help. You can find online tutorials or videos that demonstrate the installation process. Additionally, manufacturers often offer customer support for installation assistance, which can save you time and prevent errors.
Not Double-Checking for Possible Circuit Issues
Before changing out a light fixture, it’s essential to check for any underlying circuit issues. Simply swapping out the fixture might not resolve problems like flickering lights, tripped breakers, or intermittent power. These issues are often indicative of deeper electrical problems that need to be addressed before you continue with the installation. Failing to identify and address circuit problems can lead to further damage to your new fixture or electrical hazards.
How to Check for Electrical Circuit Problems
Checking the circuit’s health beforeinstalling your new fixture is a crucial step that can save you time, money, and hassle down the road. Here’s how to properly troubleshoot your electrical circuit:
- Test for Continuity with a Multimeter: Use a multimeterto check for continuityin the circuit. A multimeter will help you identify if the circuit is complete and if there are any interruptions in the wiring that could cause issues. If the circuit shows no continuity, it’s an indication that there’s a break or fault somewhere in the wiring.
- Inspect for Loose Connections: Check the electrical connections at the switch, outlet, or junction box. Loose or damaged connections are often the root cause of flickering lights or intermittent power. Tighten any loose screws and ensure the wires are securely attached to their respective terminals.
- Examine the Breaker Box: Inspect the breaker boxfor signs of problems. Look for any tripped breakersor damaged fuses. If a breaker keeps tripping, this may indicate an overload or short circuit in the circuit, which could prevent your new fixture from operating correctly.
- Check for Overloaded Circuits: If the circuit is overloaded (i.e., too many fixtures or appliances drawing power from the same line), it can cause flickering or frequent tripping of the breaker. You may need to reassign the fixture to a different circuit or upgrade the wiring to accommodate additional loads.
- Inspect Grounding and GFCIs: Verify that the wiring is properly grounded and that Ground Fault Circuit Interrupters (GFCIs)are functioning correctly, especially in damp areas like bathrooms or kitchens. Faulty grounding or GFCI issues can lead to electrical hazards.
Essential Insights to RememberKey Takeaways
In conclusion, changing out a light fixturemay seem like a simple DIY task, but it requires careful attention to safety, compatibility, and proper installation techniques. By avoiding common mistakes such as neglecting to turn off the power supply, overlooking wiring conditions, or disregarding manufacturer instructions, you can ensure a smooth and safe installation. Always verify that the new fixture is compatible with your existing wiring and circuit setup to prevent costly repairs or malfunctions. Taking these precautions will not only protect your home but also enhance the lifespan and functionality of your new light fixture.
Looking ahead, as DIY home improvement projects become increasingly popular, the importance of following best practices when changing out a light fixturewill only grow. Whether you’re a seasoned DIYer or a first-timer, always prioritize safety and thoroughness in every step of the process. If you’re ever in doubt, don’t hesitate to consult with a professional electrician to ensure the job is done correctly. We’d love to hear about your experiences or any tips you have—feel free to leave a comment below!
FAQs – People Also Ask
1. What should I do if I accidentally touch a live wire while changing a light fixture?
If you accidentally touch a live wire while changing out a light fixture, immediately stop what you’re doing and remove your hand. If you’re unable to break free, try to use a non-conductive object like a wooden broomstick to push the wire away. Afterward, seek immediate medical attention, even if you feel fine, as electrical shocks can cause delayed reactions. Always ensure the power is off before starting any electrical work to avoid such risks.
2. How can I tell if my old light fixture is still compatible with a new one?
To determine if your old light fixture is compatible with a new one, check the wattage rating, voltage, and mounting typeof both fixtures. Ensure that the junction box dimensions and the weight of the new fixture match the existing setup, and verify that the bulb type and wattage don’t exceed the capacity of your wiring. If you’re unsure, consult an electrician for guidance on fixture compatibility.
3. Is it safe to change a light fixture myself or should I hire an electrician?
Changing a light fixture can be safe for DIYers who have basic electrical knowledge and follow all safety precautions. However, if you’re unsure about wiring or if the fixture requires complex installation, it’s best to hire a licensed electrician. This ensures the work is done to code and reduces the risk of electrical hazards or code violations.
4. What are some common issues that could cause a light fixture to stop working after installation?
Common issues that may cause a light fixture to stop working include faulty wiring connections, improper grounding, or a tripped circuit breaker. Loose connectionsor burnt-out bulbsare also frequent culprits. Ensuring all wiring is secure, checking the circuit, and replacing the bulb can often solve the problem.
5. Can I change out a light fixture if I have no prior electrical experience?
While changing out a light fixtureis manageable for beginners, it’s essential to familiarize yourself with electrical safety and the fixture’s installation requirements before attempting the job. If you’re not confident, consider consulting instructional guides or calling an electrician to ensure a safe and correct installation. Never skip the crucial step of turning off the power to avoid any risks.
Ensure Safe and Reliable Electrical Work with Boca Electrical Services, Inc.
Changing out a light fixture may seem like a straightforward task, but as we’ve highlighted in this article, there are several potential pitfalls that can lead to safety risks or costly repairs. At Boca Electrical Services, Inc., we understand the importance of getting it right the first time. With over 38 years of combined experience, our licensed electricians are here to guide you through every electrical project—whether you’re upgrading your fixtures or tackling a more complex installation.
If you’re unsure about handling electrical work yourself or want a professional touch to ensure safety and efficiency, Boca Electrical Services, Inc.is just a call away. We offer expert services in residential electrical, ceiling fan reinstallations, chandelier installations, and more. Don’t hesitate to contact us for a free home safety inspectionor to get personalized advice tailored to your needs. Visit our website or call us at +1 561-235-2513to schedule a consultation. Let us help you light up your space—safely and effectively!